
You've mastered a skill of building uncluttered layout for your Clean and Simple cards, but you would like to add eye-catching details to make them stand out. Today I share a few simple tips to step up your game to turn your cards into amazing papercrafting projects.
 Вы уже научились создавать легкие, незагруженные композиции для Ваших открыток в стиле Чисто и просто, но Вам хотелось бы добавить детали, привлекающие внимание. Сегодня я поделюсь несколькими простыми приёмами, которые превратят Ваши открытки в потрясающие.
In this post I share several simple things you should do for your next Clean and Simple card when you add dimensional details.
You know already that the easiest way to add extra dimension to your card is to use layered die cuts. But what small steps will make these die cuts stand out?
В этой публикации я рассказываю о простых способах, которые Вы сможете применить в следующий раз, когда будете добавлять объёмные детали к открытке.
Вы уже знаете, что простейший способ добавить объём - использовать многослойные вырубки. Но как сделать их необычными?
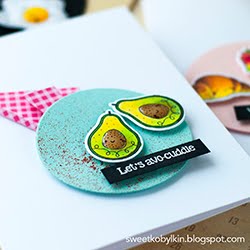
For todays card I used again a cute stamps ( SSS | MFT ) and dies set BUBBLE OVER WITH JOY( SSS | MFT ) from My Favorite Things. The first card with this set I shared HERE.
Для этой открытки я опять использовала очаровательный набор штампов BUBBLE OVER WITH JOY ( SSS | MFT ) с парными ножами ( SSS | MFT ) от американской компании My Favorite Things. Первую открытку с этим набором можно посмотреть ЗДЕСЬ.
 To add dimension to my card I used BIG THANKS Die-Namics ( SSS | MFT ) also from My Favorite Things.
Для создания выпуклой детали я использовала нож для вырубки BIG THANKS Die-Namics ( SSS | MFT ) также от компании My Favorite Things.

To finish off the card stamp the sentiment below the adhered Thanks word and pop the Copic coloured bunny up with a foam tape.
Для завершения работы сделайте оттиск надписи под приклеенной вырубкой, а раскрашенного зайку посадите на вспененный скотч.
And again I am adding shiny BALLERINA PINK Sequins ( SSS | SHP ) to lightly decorate the card and match the bubbles pattern. To glue sequins I prefer to use Multi Medium Matte glue, because it does not stain the card stock and holds sequins firmly.
И снова я использую переливающиеся BALLERINA PINK пайетки ( SSS | SHP ) для лёгкого украшения открытки и повторения мотива мыльных пузырей. Как всегда пайетки я сажаю на клей Multi Medium Matte, потому что он не оставляет следов, а пайетки не отваливаются.
I do not count sequins or position them strategically, I just sprinkle them over the card and maybe remove excess.
Я перестала считать пайетки и искать правильное расположение для них. Я просто рассыпаю горстку по открытке, может быть, смахиваю пару лишних.
This card as well contains three key elements I mentioned in one of my PREVIOUS posts. The stamped bubble pattern plays a role of an uncluttered background, Big Thanks die cut - raised details, and sequins are enough to be a light embellishment.
Эта работа, как и одна из ПРЕДЫДУЩИХ, содержит в себе три основных элемента, улучшающих открытки в стиле Чисто и просто. Раскрашенный мыльные пузыри выступают в роли лёгкого фона, вырубка Big Thanks - в роли объёмной детали, а светлых пайеток достаточно для умеренного украшения работы.
 This card's colour scheme is inspired by MFT Color Challenge #91
Я использовала цветовую гамму из чб MFT:

And I am also sharing this card to the following challenges:
И я также показываю эту открытку в следующих чб галлереях:
Addicted to CAS #134 - Bubbles/Пузыри
 Colour Crazy Challenge Week 16 - Anything Goes
Crafty Catz #413 - Anything Goes
Crafting with Friends #65 - Anything Goes
Cut It Up #146 - Bugs and Critters
Fussy & Fancy #210 - Add A Die Cut
Pattie's Creations Design Challenge #145 - Bunnies and/or Ducks (2nd entry)
Simply Create Too #137 - Use Die Cuts
Less is More #369 - Bring Something Back/Использовать что-то старое
 I am using a newly released stamps and dies set, but it made me bring back the old set of sequins, that were sitting in my stash for a couple of years. I am not that keen on sequins, but these soap bubbles stamps go so well with these big pink sequins.
Добавляю, не смотря на то, что набор штампов - новинка, а вот пайетки сидели в столе уже очень давно. Я не любитель пайеток, но эти мыльные пузыри идеально сочетаются с крупными блестящими пайетками.
Thanks for stopping by. Have a great day!


In this post I share several simple things you should do for your next Clean and Simple card when you add dimensional details.
You know already that the easiest way to add extra dimension to your card is to use layered die cuts. But what small steps will make these die cuts stand out?
В этой публикации я рассказываю о простых способах, которые Вы сможете применить в следующий раз, когда будете добавлять объёмные детали к открытке.
Вы уже знаете, что простейший способ добавить объём - использовать многослойные вырубки. Но как сделать их необычными?
For todays card I used again a cute stamps ( SSS | MFT ) and dies set BUBBLE OVER WITH JOY( SSS | MFT ) from My Favorite Things. The first card with this set I shared HERE.
Для этой открытки я опять использовала очаровательный набор штампов BUBBLE OVER WITH JOY ( SSS | MFT ) с парными ножами ( SSS | MFT ) от американской компании My Favorite Things. Первую открытку с этим набором можно посмотреть ЗДЕСЬ.

Для создания выпуклой детали я использовала нож для вырубки BIG THANKS Die-Namics ( SSS | MFT ) также от компании My Favorite Things.
Tips on Adding Dimension to a CAS Card:
- Use the smallest stamps from a set to create your patterns.
Most of the sets contain small details or tiny images stamps. For example, BUBBLE OVER WITH JOY ( SSS | MFT ) includes two stamps of soap bubbles clusters. I am using these bubbles stamps on my die cut to add pattern to it. In THIS card I used a chicken and a hen images from The Whole Herd set to create my own patterned paper.
- Add colour layers to your die cuts
This is a common way to stack up die cuts to make them dimensional. Try layering die cuts from card stock in a colour matching your card's palette.
How To Apply These Tips:
- Place My Favorite Things BIG THANKS die ( SSS | MFT ) onto a white card stock, trace its border and remove it
- Stamp down bubbles clusters from My Favorite Things BUBBLE OVER WITH JOY set ( SSS | MFT ) in alcohol-friendly ink within the traced border and colour the impressions with Copic Sketch markers. This will help to highlight the white die cut on a white card base.
- Die cut one Thanks from a stamped card stock and four from a pink card stock. Stack up and glue die cuts with matte glue to avoid shiny stains ( SSS | AMZUS ).
- To align letters perfectly onto the card base use a negative die cut.
Советы по созданию объёмных деталей:
- Используйте самые маленькие штампы для собственных узоров
Большинство наборов содержат мелкие штампы. Например, в комплект Bubble over with Joy входят два штампа с мыльными пузырями. Я предлагаю использовать их для создания рисунка на верхнем слое объёмной вырубки. Для ЭТОЙ открытки я использовала штампы цыплёнка и курицы из набора The Whole Herd.
- Добавьте цветные слои к Вашей вырубке
Проще всего сделать вырубку объёмной путем сложения нескольких слоёв бумаги. Почему бы следующие 3-4 слоя не сделать из цветного кардстока в гамме Вашей работы?
Как применить эти советы?
- Наложите нож Big Thanks на кусок белого кардстока и легко обрисуйте его простым карандашом.
- Сделайте оттиски мыльных пузырей из набора Bubble over with Joy чёрными чернилами, подходящими для дальнейшего раскрашивания спиртовыми маркерами, внутри границы вырубки и раскрасьте пузыри маркерами Copic Sketch. Это поможет выделить белую вырубку на белом фоне открытки.
- Из отштампованного белого кардстока сделайте одну вырубку слова Thanks, а также из розового - четыре.
- Склейте все вырубки матовым клеем, не оставляющим пятен на бумаге.
- Чтобы ровно приклеить буквы к основе открытки, используйте оставшийся негатив от вырубки.

To finish off the card stamp the sentiment below the adhered Thanks word and pop the Copic coloured bunny up with a foam tape.
Для завершения работы сделайте оттиск надписи под приклеенной вырубкой, а раскрашенного зайку посадите на вспененный скотч.
And again I am adding shiny BALLERINA PINK Sequins ( SSS | SHP ) to lightly decorate the card and match the bubbles pattern. To glue sequins I prefer to use Multi Medium Matte glue, because it does not stain the card stock and holds sequins firmly.
И снова я использую переливающиеся BALLERINA PINK пайетки ( SSS | SHP ) для лёгкого украшения открытки и повторения мотива мыльных пузырей. Как всегда пайетки я сажаю на клей Multi Medium Matte, потому что он не оставляет следов, а пайетки не отваливаются.
I do not count sequins or position them strategically, I just sprinkle them over the card and maybe remove excess.
Я перестала считать пайетки и искать правильное расположение для них. Я просто рассыпаю горстку по открытке, может быть, смахиваю пару лишних.
This card as well contains three key elements I mentioned in one of my PREVIOUS posts. The stamped bubble pattern plays a role of an uncluttered background, Big Thanks die cut - raised details, and sequins are enough to be a light embellishment.
Эта работа, как и одна из ПРЕДЫДУЩИХ, содержит в себе три основных элемента, улучшающих открытки в стиле Чисто и просто. Раскрашенный мыльные пузыри выступают в роли лёгкого фона, вырубка Big Thanks - в роли объёмной детали, а светлых пайеток достаточно для умеренного украшения работы.
Я использовала цветовую гамму из чб MFT:

And I am also sharing this card to the following challenges:
И я также показываю эту открытку в следующих чб галлереях:
Addicted to CAS #134 - Bubbles/Пузыри
Crafty Catz #413 - Anything Goes
Crafting with Friends #65 - Anything Goes
Cut It Up #146 - Bugs and Critters
Fussy & Fancy #210 - Add A Die Cut
Pattie's Creations Design Challenge #145 - Bunnies and/or Ducks (2nd entry)
Simply Create Too #137 - Use Die Cuts
Less is More #369 - Bring Something Back/Использовать что-то старое
Добавляю, не смотря на то, что набор штампов - новинка, а вот пайетки сидели в столе уже очень давно. Я не любитель пайеток, но эти мыльные пузыри идеально сочетаются с крупными блестящими пайетками.
Thanks for stopping by. Have a great day!

Спасибо, что заскочили. Желаю всем прекрасного дня!
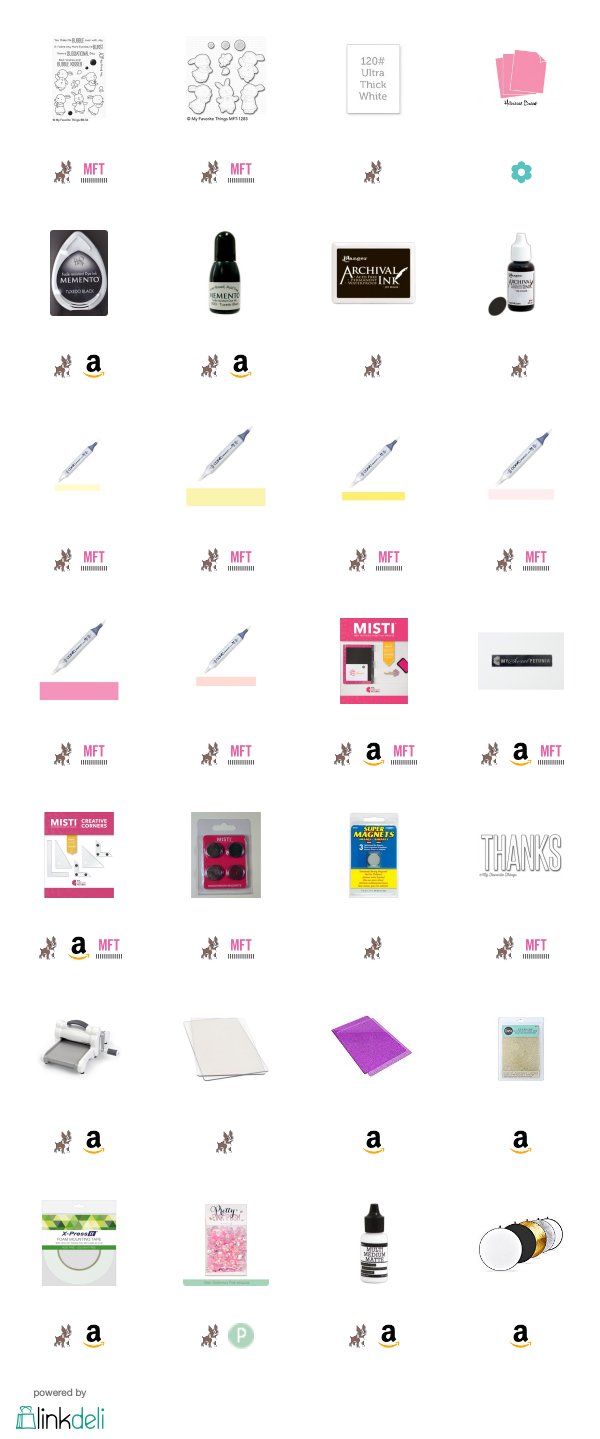
Supplies Used
Compensated affiliate links used. I personally have bought all the below displayed products. This post was not paid or sponsored.
Click on the icons below to go to your preferred online store. If you buy any of these products following my link, I will receive a small commission at no cost for you.
I am grateful to you, if you help me running this blog.


Such a sweet and creative card!
ReplyDeleteBeautiful card, and I loved reading your post. I learned quite a few things!! It actually made me think of something. I just commented on another card submitted to CIU with a link to a new blog that you may be interested in. It helps new crafters learn techniques, and they're having a DT call. Here's the link if you're interested in applying:
ReplyDeletehttps://bbbchallenges.blogspot.co.uk/
Anyway - back to your card. I love it and will try some of the techniques!! Thanks for sharing your creation with us for our Bugs and Critters challenge at Cut it Up!
Evelyn
http://mylittlecraftblog.wordpress.com
Thanks for joining us at Less is More this week Ksenija. Your card is super CAS and super stunning and love your explanation behind it. Sadly we have a limit of 5 challenge link ups including our own at Less is More, therefore your card won't be eligible for prizes / showCASe but I'm thrilled you've shared it in our gallery.
ReplyDeleteHi this is a stunning card I love it. Thank you for joining us at Crafty Catz Weekly Challenge Blog for challenge 413 the theme is Anything Goes with the optional theme of the CAS (Clean and Simple) and the sponsor is A Day for Daises. Hugs Jackie (DT)
ReplyDeleteSuch a sweet card! Thanks for sharing at ATCAS!
ReplyDeleteAbsolutely adorable card, Ksenija! I love that you used the bubbles from this set to create your pattern and the hot pink peeking out from behind is perfect! Thanks so much for sharing tips with us about using small images to create a pattern...I'm going to try it!
ReplyDeleteThanks so much for playing along with us again this week at Addicted to CAS!
You are such a wonderful teacher, Ksenija! I love all the tips and your remarkably sweet and colorful bubbly card!! Thank you for the smile!! Hugs, Darnell
ReplyDeleteAdorable CAS card, Ksenija! Great tips and explanation. Thank you for joining us at Less is More. x
ReplyDeleteAnother gorgeous CAS card from you, Ksenija ! I love this technique and I remember your previous cards with it. It is so effective and make such CAS design. Too bad you entered in too many challenges, anyway thanks a lot for sharing and entering in our gallery at Less is More.
ReplyDeleteI love it! So cute and playful! :)
ReplyDeleteThanks a lot for joining us at Fussy and Fancy! :)
Wow such a great and beautiful card thanks for the tips and explanation. Thanks for playing along with ATCAS.
ReplyDeleteYour card is very cute - love the bunny, the sentiment
ReplyDeleteand the lettering. Thanks for joining us at
Pattie's Creations Challenge.
Sorry this is late, Ksenija. I love the total design of your card. The use of the die cut sentiment is so well done. Thanks for joining us at Simply Create Too Challenge. Cheers, Janelle (DT) :)
ReplyDeleteI like this post,And I guess that they having fun to read this post,they shall take a good site to make a information,thanks for sharing it to me. Maquininha UOL Pag Seguro
ReplyDelete