
Floral stamps are the most popular in Spring. I always enjoy floral bouquet stamps, but individual floral stamps give more space for creativity, specially if you try a new technique. Hello Everyone!

Весна - самое подходящее время года для цветочных открыток. Чаще всего я выбираю букетные штампы, но иногда отдельные цветочные штампы дают больше пространства для творчества, особенно если попробовать новый приём. Всем привет!
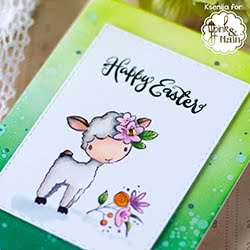
From this post you will see how to make a card with a floral frame from individual stamped and coloured die cuts.
В этой публикации я расскажу, как создать цветочную рамку из отдельных вырубок.
For my card I used Even More Spring Flowers stamps and coordinating dies set as well as Big Thanks Words stamps and dies set from Best Days Simon Says Stamp exclusive design release.
Для своей открытки я использовала новый комплект штампов и парных ножей Even More Spring Flowers, а также набор штампов и ножей Thanks Words из недавнего релиза Best Days от американской компании Simon Says Stamp.
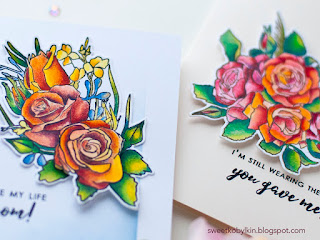
Making a floral frame of individual die cuts is an easy way to build a fancy layout for an intricate and elegant card. To add more interest I decided to use die cuts instead of stamping directly to a note card and pop every detail up with a foam tape.
Создание цветочной рамки из отдельных вырубок - простой и красивый приём для элегантной и немного замысловатой открытки. Для большей эффектности я решила приподнять каждый элемент с помощью вспененного скотча.
I started with die cutting flowers and branches, then stamping them with a help of MISTI Tool and colouring with Copic Sketch markers. I really love how soft pink and juicy green look on this card. I list all the markers I used at the end of this post with direct links to online stores for your convenience.
Я начала с отштамповки вырубок при помощи MISTI Tool и раскрашивания спиртовыми маркерами Copic Sketch. Неожиданно для себя я получила очень нежные переходы оттенков, выбранных для цветов. В конце публикации я перечисляю все маркеры, которые я использовала для этой открытки.
I also die cut a big Thanks word from a black card stock, stamped it and heat embossed with a fine white powder. Before stamping I applied antistatic powder to the die cut. This powder makes black cardstock look dull, to clean it thoroughly after heat embossing I use these wipes.
Из черного кардстока с помощью ножа Thanks я сделала вырубку, затем оттиск этого же слова и запекла с тонкой белой пудрой.

To make a frame I traced a border onto a note card with a pencil and firstly positioned the word Thanks and then aligned a short sentiment under it. I removed Thanks word and stamped the sentiment with black ink, only after this I started assembling the card.
Для сборки открытки я очертила простым карандашом рамку на основе открытки, нашла правильно расположение большой вырубки Thanks и разместила под ней фразу из набора Thanks Words. Убрав вырубку, я сделала оттиск надписи чёрными чернилами и приступила к сборке открытки.
Finding the right place for every element I was trying to go over the traced border and later cutting off unnecessary parts along the straight border line. This helped me to create a visual frame for the flowers.
Чтобы создать визуальный эффект рамки необходимо каждый элемент размещать с выступом за пределы рамки и затем обрезать по прямой лишние части.
I paid attention to avoiding elements overlapping in order to give enough space for every detail and have beautiful shades.
При сборке я старалась избежать наслоение элементов, чтобы не перегрузить открытку и получить красивые тени от каждой детали.
I adhered every detail with a very thick foamed tape.
При помощи супер-толстого скотча я приклеила каждый элемент.
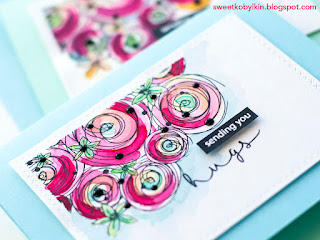
 To stay with the selected soft Spring colour palette I used Iridescent Jewels that have a beautiful rainbow shine and match apple blooms perfectly. To adhere the jewels I used a liquid glue that does not stain the card stock.
Для дополнительного украшения я использовала переливающиеся хрусталики, отлично подходящие по оттенку к нежной весенней гамме этой открытки.
To finish off my card I added a little bit of glitter to the flowers and leaves.
И в завершение я добавила акценты жидким глиттером на листья и лепестки.
 Even More Spring Flowers stamps and coordinating dies set works very well for making a floral frame because all images are rather big and help to create visual lines. This set is part of exclusive Simon Says Stamp release and is available at only at the online store.
На мой взгляд, набор штампов и ножей Even More Spring Flowers идеально подходит для этой техники создания цветочной рамки. Каждый элемент достаточно крупный и прекрасно создает иллюзию линий.
I am sharing this card to the following challenge galleries:
Я показываю эту открытку в следующих чб:
Muse Card Club #261 - CASEing Spring card by Tracey
 Time Out Challenge #107 - Spring (without a twist)
 Addicted to Stamps And More #287 - Make Your Mark
 TCP Tuesday #345 Challenge - Spring
Dare 2B Artzy - Pastel Colours
And the final tip before I go.
To make better pictures of cards with shiny or iridescent details I use a silver reflector that softens shades and brings on more shine. But I will write a separate post soon about photography for card makers.
Click the images to go directly to the posts
Нажмите на фото для перехода к статьям

 If you have not done yet, follow my blog so you can read the future posts as soon as I publish them and be updated about CRAFTY SALES events and discount codes. Have a great day!
Если Вы ещё не подписались на мой блог на панельке справа, сделайте это сейчас, чтобы не пропустить новые публикации и своевременно узнавать о распродажах и кодах для скидок, которые я публикую на новой странице CRAFTY SALES. Желаю всем отличного дня!


Весна - самое подходящее время года для цветочных открыток. Чаще всего я выбираю букетные штампы, но иногда отдельные цветочные штампы дают больше пространства для творчества, особенно если попробовать новый приём. Всем привет!
From this post you will see how to make a card with a floral frame from individual stamped and coloured die cuts.
В этой публикации я расскажу, как создать цветочную рамку из отдельных вырубок.
For my card I used Even More Spring Flowers stamps and coordinating dies set as well as Big Thanks Words stamps and dies set from Best Days Simon Says Stamp exclusive design release.
Для своей открытки я использовала новый комплект штампов и парных ножей Even More Spring Flowers, а также набор штампов и ножей Thanks Words из недавнего релиза Best Days от американской компании Simon Says Stamp.
Making a floral frame of individual die cuts is an easy way to build a fancy layout for an intricate and elegant card. To add more interest I decided to use die cuts instead of stamping directly to a note card and pop every detail up with a foam tape.
Создание цветочной рамки из отдельных вырубок - простой и красивый приём для элегантной и немного замысловатой открытки. Для большей эффектности я решила приподнять каждый элемент с помощью вспененного скотча.
I started with die cutting flowers and branches, then stamping them with a help of MISTI Tool and colouring with Copic Sketch markers. I really love how soft pink and juicy green look on this card. I list all the markers I used at the end of this post with direct links to online stores for your convenience.
Я начала с отштамповки вырубок при помощи MISTI Tool и раскрашивания спиртовыми маркерами Copic Sketch. Неожиданно для себя я получила очень нежные переходы оттенков, выбранных для цветов. В конце публикации я перечисляю все маркеры, которые я использовала для этой открытки.
I also die cut a big Thanks word from a black card stock, stamped it and heat embossed with a fine white powder. Before stamping I applied antistatic powder to the die cut. This powder makes black cardstock look dull, to clean it thoroughly after heat embossing I use these wipes.
Из черного кардстока с помощью ножа Thanks я сделала вырубку, затем оттиск этого же слова и запекла с тонкой белой пудрой.
To make a frame I traced a border onto a note card with a pencil and firstly positioned the word Thanks and then aligned a short sentiment under it. I removed Thanks word and stamped the sentiment with black ink, only after this I started assembling the card.
Для сборки открытки я очертила простым карандашом рамку на основе открытки, нашла правильно расположение большой вырубки Thanks и разместила под ней фразу из набора Thanks Words. Убрав вырубку, я сделала оттиск надписи чёрными чернилами и приступила к сборке открытки.
Finding the right place for every element I was trying to go over the traced border and later cutting off unnecessary parts along the straight border line. This helped me to create a visual frame for the flowers.
Чтобы создать визуальный эффект рамки необходимо каждый элемент размещать с выступом за пределы рамки и затем обрезать по прямой лишние части.
I paid attention to avoiding elements overlapping in order to give enough space for every detail and have beautiful shades.
При сборке я старалась избежать наслоение элементов, чтобы не перегрузить открытку и получить красивые тени от каждой детали.
I adhered every detail with a very thick foamed tape.
При помощи супер-толстого скотча я приклеила каждый элемент.

Для дополнительного украшения я использовала переливающиеся хрусталики, отлично подходящие по оттенку к нежной весенней гамме этой открытки.
To finish off my card I added a little bit of glitter to the flowers and leaves.
И в завершение я добавила акценты жидким глиттером на листья и лепестки.
На мой взгляд, набор штампов и ножей Even More Spring Flowers идеально подходит для этой техники создания цветочной рамки. Каждый элемент достаточно крупный и прекрасно создает иллюзию линий.
I am sharing this card to the following challenge galleries:
Я показываю эту открытку в следующих чб:
Muse Card Club #261 - CASEing Spring card by Tracey


Dare 2B Artzy - Pastel Colours
And the final tip before I go.
To make better pictures of cards with shiny or iridescent details I use a silver reflector that softens shades and brings on more shine. But I will write a separate post soon about photography for card makers.
Looking for more floral cards inspiration?
Еще примеры цветочных открытокClick the images to go directly to the posts
Нажмите на фото для перехода к статьям
Если Вы ещё не подписались на мой блог на панельке справа, сделайте это сейчас, чтобы не пропустить новые публикации и своевременно узнавать о распродажах и кодах для скидок, которые я публикую на новой странице CRAFTY SALES. Желаю всем отличного дня!
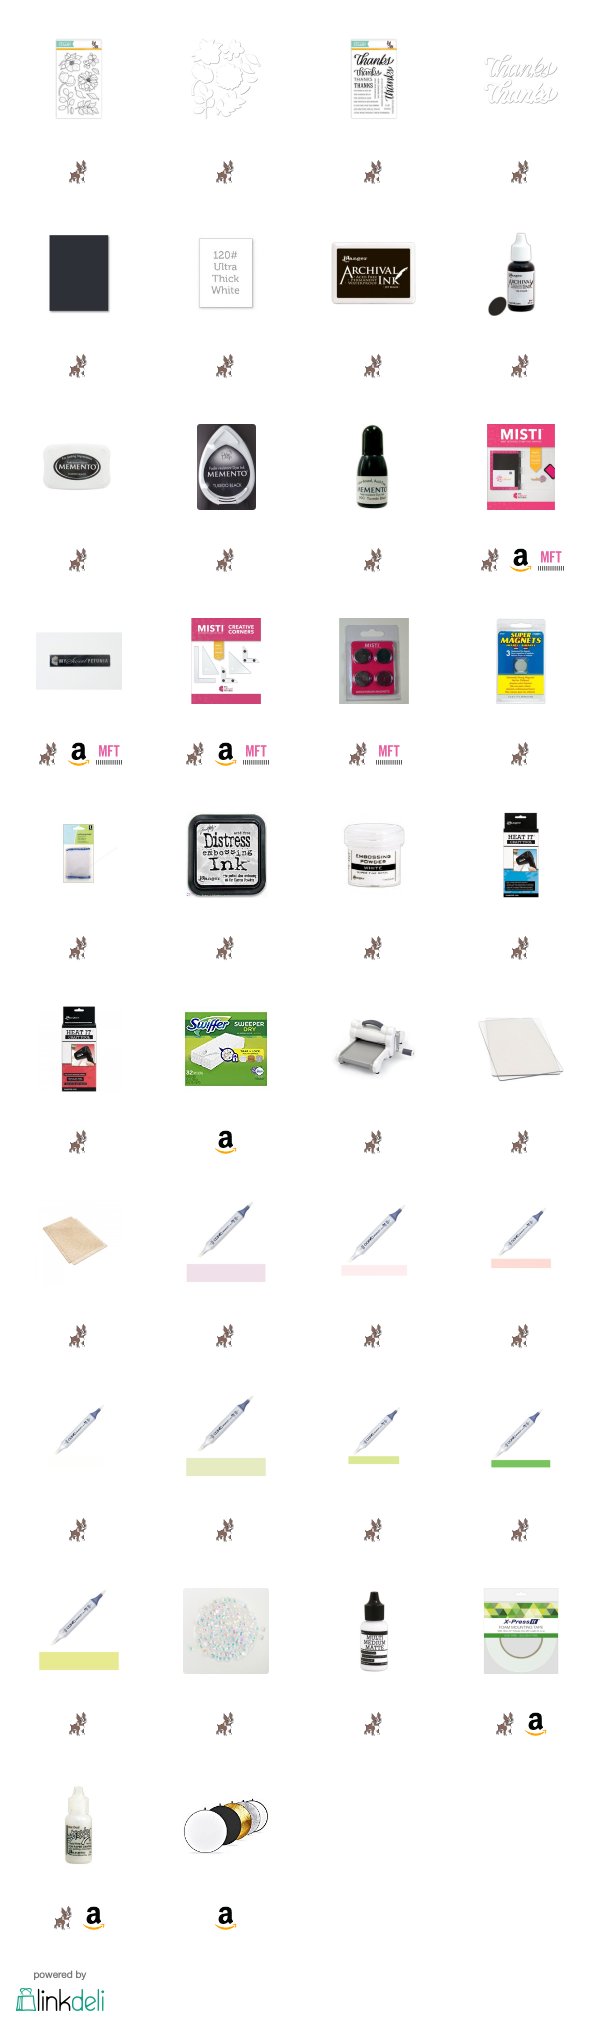
Supplies Used
Compensated affiliate links used. I personally have bought all the below displayed products. This post was not paid or sponsored.
Click on the icons below to go to your preferred online store. If you buy any of these products following my link, I will receive a small commission at no cost for you.
I am grateful to you, if you help me running this blog.


lovely card ksenija..loved the bold sentiment and how u placed sequins in between.
ReplyDeleteSo beautiful Ksenija ! I love the very soft pink colour on your flowers so beautifully highlighted with the fresh and bright green leaves. A gorgeous design which makes delicate shadows. I LOVE it ! xx
ReplyDeleteSo pretty! Fresh and springlike. Love the sparkle from the gems! Thanks for joining us at Muse this week!
ReplyDeleteoh wow, Your card is just gorgeous Ksenija, so pretty and soft
ReplyDeleteSuch a beautiful and well balanced card. The design, colours and embellishments are stunning. Thank you for following my blog and your kind words, it was lovely x
ReplyDeleteGorgeous! Loved the frame you created with the popped up florals.
ReplyDeleteThis is just stunning and I love the beautiful soft colours.
ReplyDeletelovely card...loved the frame you created
ReplyDeleteSuch a beautiful card Ksenija, as always so perfectly coloured. I love it.
ReplyDeleteWhat an absolutely stunning card. I really like the frame you designed. Thanks so much for playing along at Time Out.
ReplyDeleteAnother gorgeous card Ksenija, i saved it on instagram for my future inspiration! Thanks for sharing it with us at Addicted to Stamps and More.Hugs, Gwendolyn
ReplyDeletewooow Ksenija...I love how you have made that flower die cutting to be frame
ReplyDeleteand I cant imagine how you made it to be in a LINE
Love your idea and how many double side tape you used
this is an amazing card and the colors are Stunning
all your card are Adorable miss lady
many thanks for playing with us at Addicted to Stamps and More
hugs
Monika
Thank you, dear Monika for your kind comment. I guess I have to make more video tutorials than I do to show that my cards are not complicated at all. Re: the foam tape - I use a very thick and wide one, x-press it, it is in the supplies used list. I am not using 3M anymore. With this tape I need only one layer and it often covers the whole die cut because it is a really wide tape.
DeleteKsenija, I was so happy to see this gorgeous number in our TCP gallery today! What a fabulous design!
ReplyDelete=]
Congrats for being our winner at Time Out-see blog for details x
ReplyDeleteThank you, dear Sandie, for bringing this happy news! Heading to TO blog :)
Delete